To create DIY concrete countertops, you'll need melamine boards for forms, high-quality concrete mix, reinforcement mesh, and essential tools like a circular saw and orbital sander. Begin by building watertight forms with silicone-sealed corners, then mix concrete at a 1:2:3 ratio. Pour the mixture while incorporating reinforcement mesh, and allow proper curing for 24-48 hours. After removal, progress through wet-sanding stages and apply multiple sealer coats. Professional-grade results require mastering several critical techniques and specifications.
Essential Tools and Materials You'll Need
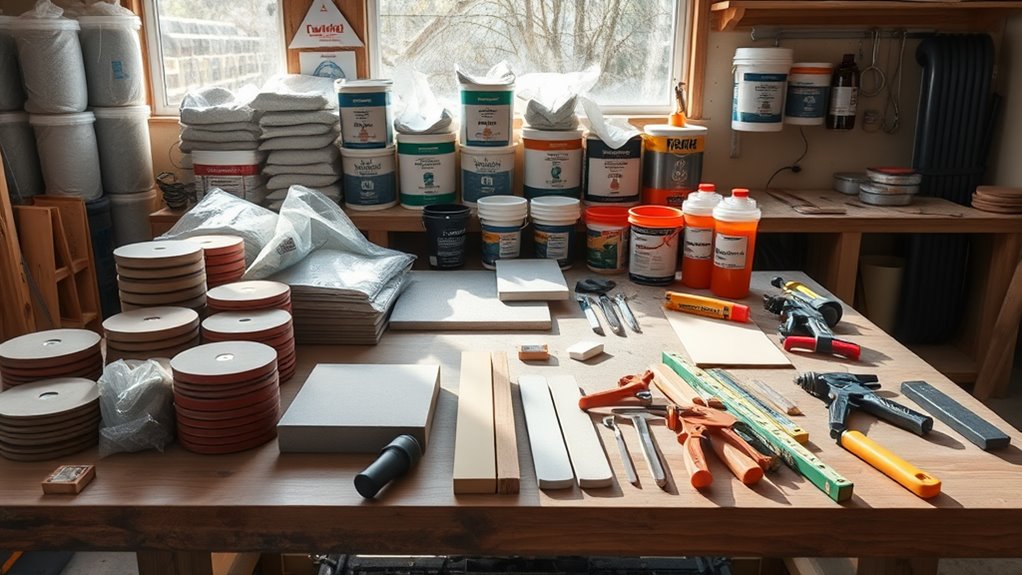
Before starting your concrete countertop project, you'll need to gather specific tools and materials to guarantee professional-quality results. Your essential tools include a circular saw, orbital sander, caulk gun, concrete mixing drill attachment, and precise measuring instruments. You'll also need melamine boards for forming, concrete reinforcement mesh, and vibrating tools to eliminate air bubbles.
Material selection is vital for success. Source high-quality concrete mix specifically formulated for countertops, containing proper aggregates and strengthening additives. You'll require concrete sealant, release agent, silicone caulk, and concrete pigments if desired. Supplementary materials include concrete finishing trowels, foam tape for edge forming, disposable mixing containers, and appropriate safety equipment: respirator mask, safety glasses, and chemical-resistant gloves. Keep steel rebar or fiber mesh on hand for structural reinforcement.
Building the Countertop Forms
Three critical steps define the form-building process for concrete countertops: precise measuring, melamine board preparation, and strategic assembly.
You'll need to cut your melamine boards according to your countertop design, accounting for the thickness of your forms plus a 1.5-inch overhang. Apply silicone caulk to all interior seams, guaranteeing watertight corners. For form stability, secure the sides using 1 5/8-inch screws every 8 inches, pre-drilling to prevent splitting.
Install supporting braces at 12-inch intervals along the exterior to prevent bowing during the concrete pour. Create knockouts for sink openings and faucet holes using rigid foam insulation, securing them firmly to the form base. Remember to incorporate steel rebar supports according to your thickness calculations, elevating them with plastic chairs to guarantee proper placement within the concrete matrix.
Mixing and Pouring the Concrete
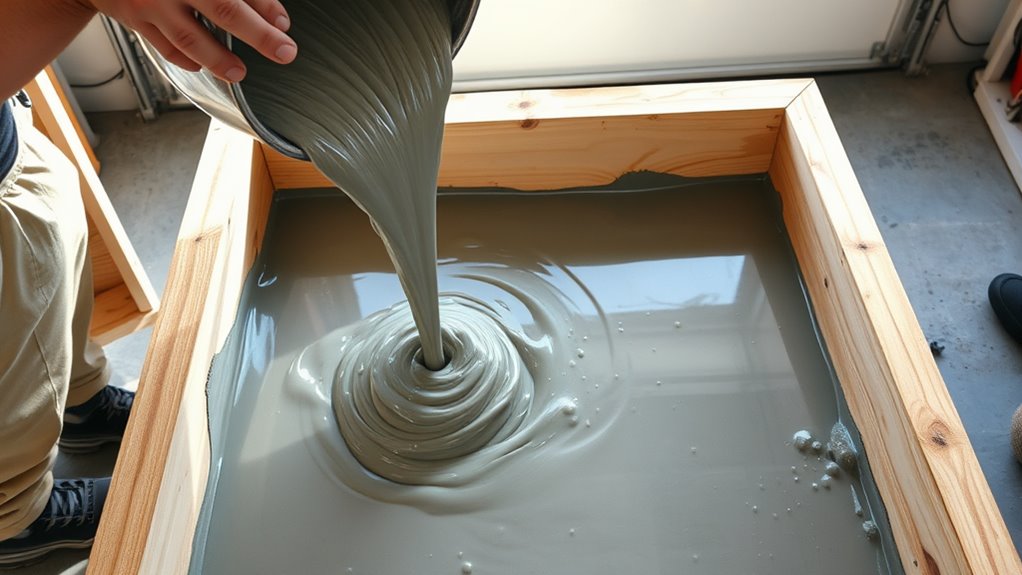
You'll need to achieve the ideal concrete mix ratio of 1:2:3 (cement:sand:aggregate) while incorporating water to reach a 0.4 water-to-cement ratio for maximum strength and workability. When pouring the concrete mixture into your prepared forms, maintain a consistent flow rate while using a concrete vibrator to eliminate air pockets and guarantee proper consolidation. Level the surface immediately using a magnesium float, working systematically from one end to the other while maintaining a uniform thickness of 1.5 to 2 inches across the entire countertop.
Proper Mixing Ratios
Getting the concrete mix ratio right is critical for achieving durable, professional-quality countertops. For ideal results, combine one part Portland cement, two parts fine sand, and 1.5 parts coarse aggregate. You'll need to maintain a water-to-cement ratio of 0.4 to 0.45 for workable consistency without compromising strength.
When implementing proper mixing techniques, start by combining your dry ingredients thoroughly in a clean mixer. Gradually add water while the mixer runs, ensuring even distribution and preventing clumping. You'll know you've achieved the right concrete ratios when the mixture resembles thick oatmeal and holds its shape when squeezed. If it's too wet, add small amounts of dry mix; if too dry, incorporate water in minimal increments until reaching the desired consistency.
Pouring and Leveling Steps
Once your concrete mix reaches the proper consistency, begin the critical pouring process by coating your mold's surface with a quality release agent. Pour the mixture steadily from one end of the mold, maintaining a consistent flow rate to prevent air pockets and guarantee uniform distribution.
Apply advanced pouring techniques by starting at the deepest sections initially, then working methodically in the direction of shallower areas. Use a concrete vibrator to eliminate entrapped air and consolidate the mix. For precise leveling tips, employ a screed board in a sawing motion across the mold's edges, assuring proper material distribution. Then, use a magnesium float to smooth the surface, working in circular motions. Don't overwork the concrete, as this can bring excess water to the surface and weaken the final product. Allow the concrete to set for preliminary curing.
Reinforcement and Embedding Techniques
Proper reinforcement techniques are critical for preventing crack formation and ensuring the structural integrity of concrete countertops. You'll need to implement strategic reinforcement methods and embedding techniques to create a durable surface that withstands daily use and temperature variations.
- Layer your primary reinforcement mesh (typically 3/8" steel or fiberglass) at the midpoint of your form's depth, maintaining a 1" clearance from edges
- Install supplementary reinforcement strips along potential stress points, particularly near sink cutouts and corners
- Integrate concrete fiber additives throughout your mix to improve tensile strength and minimize microcracking
- Embed any desired features (trivet areas, drain boards, inlays) during the initial pour, securing them with wire ties to prevent floating
Don't skimp on reinforcement – it's your countertop's backbone and insurance against future structural issues.
Curing and Removal Process
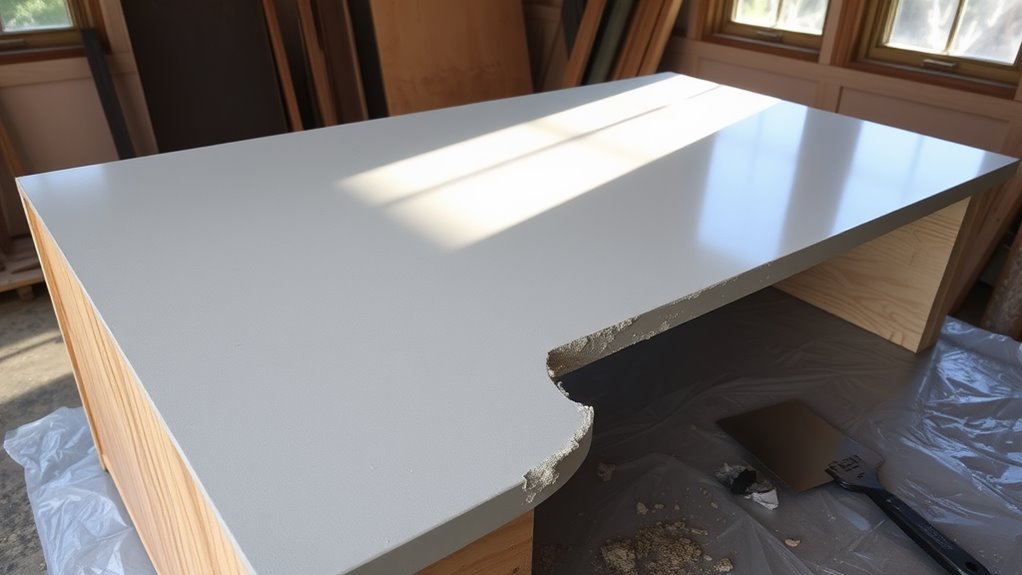
You'll need to allow your concrete countertop to cure for a minimum of 24-48 hours at room temperature before attempting form removal. After the initial curing period, carefully loosen the form's fasteners and release agents while supporting the countertop's perimeter to prevent stress cracks. The concrete will continue to gain strength over the next 28 days through hydration, reaching its ideal structural integrity for daily use.
Proper Concrete Curing Time
The curing process represents one of the most critical phases in concrete countertop fabrication, requiring strict adherence to recommended timeframes for ideal strength development. You'll need to maintain ideal temperature between 65-75°F throughout the curing period, while employing proper curing methods to achieve maximum structural integrity.
For successful concrete curing, follow these essential timeframes:
- Initial set time: Wait 24-48 hours before removing from forms
- Primary cure: Allow 7 days minimum before light handling
- Secondary cure: Continue moist curing for 14-21 days total
- Final cure: Wait 28 days before applying sealer or heavy use
During this process, you'll want to keep the surface consistently damp using plastic sheeting or wet burlap. Don't rush this phase, as proper curing directly impacts your countertop's durability and resistance to cracking.
Safe Form Removal Steps
Safe removal of concrete forms demands precise timing and methodical execution to prevent edge damage or structural compromise. After confirming proper cure time of 24-48 hours, assess form stability by gently tapping the exterior. You'll need to maintain consistent pressure during the removal process to prevent stress points.
Begin by removing any exposed fasteners and bracing while maintaining form integrity. Work systematically around the perimeter, carefully loosening the forms with a rubber mallet. Don't force separation if resistance occurs, as this may indicate incomplete curing. Instead, wait extra time to guarantee full strength development. Once you've released the sides, support the bottom form while gradually lifting the countertop. Check for any surface imperfections that may require immediate attention before the concrete fully cures.
Finishing and Sealing Your Countertops
Once your concrete countertops have fully cured for 28 days, it is crucial to properly finish and seal the surface to guarantee long-term durability and stain resistance. Apply advanced sealing techniques using a high-grade penetrating sealer designed specifically for dense cementitious surfaces.
Before applying sealers, complete these critical surface finishing steps:
- Wet-sand with progressive diamond pads (200-3000 grit) to achieve desired smoothness
- Clean thoroughly with denatured alcohol to remove all residual dust
- Apply densifier to strengthen the concrete matrix
- Fill any pinhole voids with slurry coat
After surface preparation, apply multiple thin coats of sealer using a microfiber applicator, allowing proper drying time between applications. You'll need a minimum of three coats for ideal protection against moisture, oils, and acidic substances commonly found in kitchen environments.
Troubleshooting Common Issues and Solutions
While creating DIY concrete countertops requires careful attention to detail, several common issues can arise during the fabrication process that require immediate remediation. You'll need to address problems quickly to guarantee your countertop's structural integrity and aesthetic appeal.
| Issue | Solution |
|---|---|
| Surface bubbles | Vibrate forms during pour; use concrete mix with superplasticizer |
| Cracking issues | Incorporate fiber mesh; guarantee proper curing conditions |
| Color variations | Mix thoroughly; maintain consistent water-cement ratio |
| Edge chipping | Reinforce edges with supplementary rebar; use rounded forms |
| Surface pitting | Increase cream content; implement proper finishing techniques |
Don't hesitate to grind and refinish areas with minor imperfections. For hairline cracks, apply a concrete-specific epoxy injection system. If you encounter significant structural issues, consult a concrete specialist before proceeding with repairs.
Frequently Asked Questions
How Long Will DIY Concrete Countertops Typically Last With Proper Maintenance?
With proper maintenance, your concrete countertops can last 20-50 years. Durability factors include using high-quality sealers, proper curing techniques, and adequate reinforcement during installation. You'll need to follow essential maintenance tips: resealing every 1-3 years, using pH-neutral cleaners, avoiding harsh chemicals, and promptly addressing any cracks or chips. The lifespan considerably depends on your sealing regiment and how well you protect against stains and impact damage.
Can Concrete Countertops Be Installed Over Existing Laminate or Tile Counters?
While you can pour concrete over existing surfaces, it's not typically recommended due to potential laminate preparation and tile adhesion issues. You'll need to guarantee the existing surface is completely stable and properly prepared. Instead, it's best to remove old countertops and start fresh with a clean substrate. If you do overlay, you'll need to roughen the surface, apply bonding agents, and account for added thickness at edges and backsplashes.
What's the Average Cost Savings Compared to Professionally Installed Concrete Countertops?
You'll typically save 40-60% through DIY concrete countertops compared to professional installation. While professional concrete countertops cost $65-135 per square foot installed, your DIY materials (concrete mix, reinforcement, sealers, and forms) will run $20-40 per square foot. Factor in supplementary cost considerations like tools, which might add $150-300 to your budget. The significant cost comparison advantage makes DIY concrete an attractive option for budget-conscious renovators.
Are Concrete Countertops Safe for Food Preparation and Contact?
You can safely prepare food on concrete countertops when they're properly sealed. The key to food safety lies in applying a high-quality, food-grade countertop sealing system that creates an impermeable barrier between the concrete and your food. You'll need to use a penetrating sealer followed by a topical sealer that's FDA-approved for food contact surfaces. With correct sealing and periodic reapplication, your concrete surface will remain sanitary and food-safe.
Can You Add Decorative Elements Like Glass or Stones After Pouring?
Yes, you can incorporate decorative elements through different embedding techniques. You'll want to press your chosen materials (glass pieces, stones, shells, etc.) into the wet concrete shortly after pouring, when it's reached a "peanut butter" consistency. Don't embed items too deeply—aim for 1/8 to 1/4 inch below the surface. For best results, you'll need to polish the surface after curing to expose the embedded materials and achieve a seamless finish.