To install countertops, you’ll need to measure and plan your layout carefully, gather specialized tools, and remove existing surfaces. Start by leveling your base cabinets and adding support brackets at 16-inch intervals. Cut your countertop sections precisely, accounting for 1.5-inch overhangs. Apply construction adhesive in an S-pattern, position the sections, and secure through mounting brackets. Make necessary cutouts for fixtures, then seal all joints with silicone caulk. Proper technique guarantees a professional-grade installation that will last for decades.
Measuring and Planning Your Countertop Layout

Three critical measurements form the foundation of your countertop installation plan: the length, width, and depth of your base cabinets. Using a steel measuring tape, record these dimensions precisely, measuring from wall to wall and accounting for any corners or irregularities. You’ll need to factor in a 1.5-inch overhang on the front and sides not against walls.
Create a detailed layout design by sketching your countertop’s footprint on graph paper, indicating seam locations, sink cutouts, and appliance placement. Consider your chosen countertop materials when planning seams, as different materials have varying maximum lengths and weight limitations. Mark the locations of all utilities, including electrical outlets and plumbing fixtures, to guarantee your layout accommodates these essential elements without compromising structural integrity.
Gathering Required Tools and Materials
With your measurements and layout plan finalized, assembling the right toolkit guarantees precise and efficient countertop installation. You’ll need both power tools and hand tools, along with specific materials based on your countertop type.
| Tool Type | Material Options | Safety Equipment |
|---|---|---|
| Circular Saw | Silicone Caulk | Safety Goggles |
| Level | Construction Adhesive | Work Gloves |
| Drill/Driver | Shims | Dust Mask |
| Caulk Gun | Mounting Brackets | Ear Protection |
For laminate countertops, you’ll require a router with laminate bits, while stone installations demand specialized diamond-tipped blades. Don’t forget seam clamps for joining sections and a belt sander for fine adjustments. Include a moisture meter to verify your substrate’s readiness, and keep a vacuum handy for debris removal during installation.
Removing Old Countertops Safely
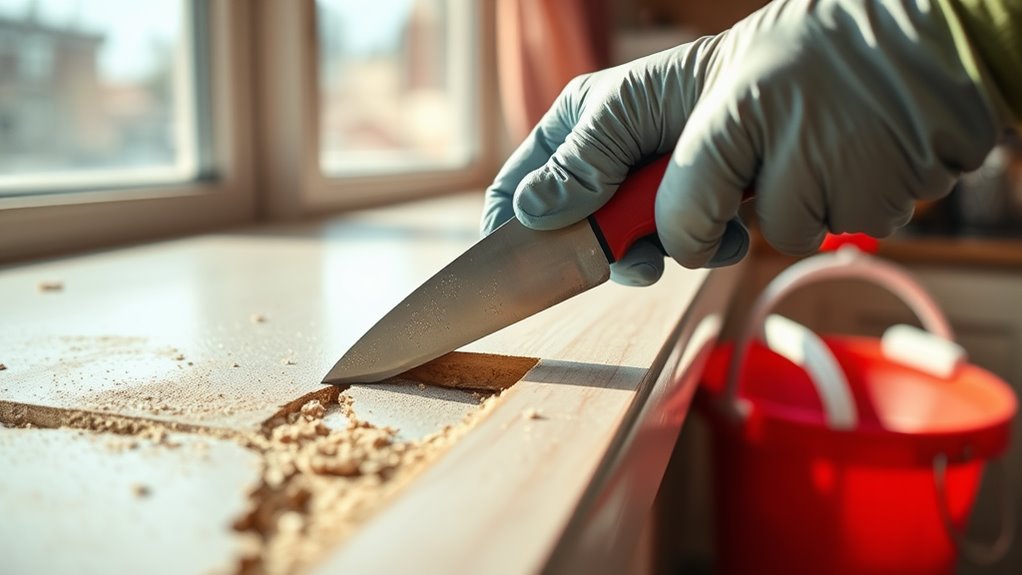
Before addressing any new countertop installation, you’ll need to carefully remove the existing surfaces while preserving the underlying cabinets and plumbing connections. Start by shutting off water valves beneath the sink and disconnecting all plumbing fixtures. Remove the sink by cutting through the caulk seal with a utility knife.
Locate the mounting screws securing the countertop to the cabinet base and remove them systematically. If the countertop is adhered with construction adhesive, use a putty knife to break the bond. For safety precautions, wear protective gloves, safety glasses, and a dust mask during removal. Cut large countertops into manageable sections using a circular saw for easier old countertop disposal. Work with a partner to lift and remove the sections, ensuring you don’t damage the cabinet framework or surrounding walls.
Preparing and Leveling the Base Cabinets
Before installing your new countertops, you’ll need to inspect the top edges of all base cabinets for damage, warping, or misalignment that could compromise the countertop’s stability. Using a 4-foot level, check multiple points across the cabinet surfaces and shim any low spots with cedar or hardwood shims until you achieve perfectly level support areas. Ultimately, tighten or replace any loose fasteners in the cabinet framework and verify all joints between cabinet sections are properly secured with mounting screws rated for cabinet installation.
Check Cabinet Top Edges
Inspecting your base cabinet top edges marks a crucial initial step in countertop installation. You’ll need to methodically examine each cabinet’s upper rim, checking alignment and evaluating damage that could affect the countertop’s fit.
| Inspection Point | Required Action |
|---|---|
| Surface Level | Use digital level to verify <1/16″ variance |
| Edge Condition | Sand rough spots, repair splits |
| Corner Joints | Confirm tight seams, fill gaps |
Use a straight edge to verify the cabinets’ tops are coplanar, as any deviation can create stress points in your countertop. If you identify warped or damaged edges, you’ll need to repair them using wood filler or replace the affected sections entirely. Check that all mounting brackets are properly secured and flush with the cabinet tops. This careful inspection prevents future complications and guarantees your countertop will sit perfectly level.
Level All Support Surfaces
Three critical steps guarantee perfectly level support surfaces for your countertops: shimming, adjusting cabinet legs, and securing level runs. Before proceeding, implement safety precautions by wearing protective eyewear and work gloves when handling surface materials.
Using a 4-foot level, check both front-to-back and side-to-side orientations across all cabinet tops. Address any discrepancies with these precise leveling techniques:
- Position cedar or composite shims under cabinet bases, ensuring gradual elevation adjustments of no more than 1/8 inch per shim
- Rotate threaded leveling legs on adjustable cabinets until bubble indicates perfect level
- Secure adjacent cabinets with mounting screws through their face frames
- Apply construction adhesive between shims and cabinet bottoms for permanent stability
Verify final measurements with both spirit and laser levels before proceeding with countertop installation.
Secure Loose Cabinet Sections
Properly securing loose cabinet sections represents an essential phase in preparing your base framework for countertop installation. Inspect each cabinet junction and identify any areas showing movement or separation. Use 2½-inch wood screws to fasten adjacent cabinet frames together, placing screws every 12 inches along the vertical stiles.
For ideal cabinet stability, drill pilot holes to prevent splitting, and verify screws penetrate both cabinet frames deeply. Apply construction adhesive between cabinets before tightening screws for improved rigidity. When joining corner cabinets, use special L-brackets at the top and bottom for extra support. Installation techniques should include checking each connection point with a level after securing. If you encounter gaps between cabinets, install shims before fastening to maintain proper alignment and prevent future movement.
Cutting and Fitting the Countertop Sections
Before making any cuts, you’ll need to take precise measurements of your cabinet runs and transfer them onto your countertop sections using a combination square and pencil. When cutting laminate or solid surface countertops, secure the material with clamps and use a circular saw equipped with a fine-tooth blade to guarantee clean, chip-free edges. For natural stone countertops, you’ll require a wet saw with a diamond blade to achieve professional-grade cuts while preventing material damage and maintaining accuracy within 1/16 inch tolerance.
Making Precise Measurements
Accurate measurements form the foundation of a successful countertop installation. Using precise tools and proper measurement techniques guarantees your countertop sections will fit perfectly against walls, cabinets, and appliances. You’ll need a tape measure, carpenter’s square, level, and scribing tool to achieve professional results.
- Start by measuring the cabinet base dimensions, including depth, width, and diagonal measurements to check for square corners
- Account for overhangs by adding 1½ inches at the front edge and ½ inch at the walls for expansion
- Mark sink and cooktop cutouts using manufacturer-provided templates and double-check all dimensions
- Document all measurements on a detailed sketch, including locations of seams, joints, and any special edge treatments
Remember to measure twice and cut once – even small errors can lead to costly mistakes during installation.
Creating Clean Cuts
Making clean, precise cuts requires specialized tools and careful attention to technique. Select a circular saw with a fine-toothed blade specifically designed for laminate countertops, guaranteeing it’s sharp and properly aligned. Mark your cutting lines clearly on both the top and bottom surfaces, using a straightedge as your guide.
When executing cutting techniques, position the countertop face-down on a stable work surface with proper support. Make your cuts in a single, steady motion, allowing the blade to reach full speed before contact. For inside corners and precise fits, use a jigsaw with the appropriate blade selection for detailed work. Always wear safety goggles and maintain firm control of your tools throughout the cutting process. Test-fit your cuts before proceeding with installation to guarantee accurate measurements and clean edges.
Installing Support Brackets and Reinforcement
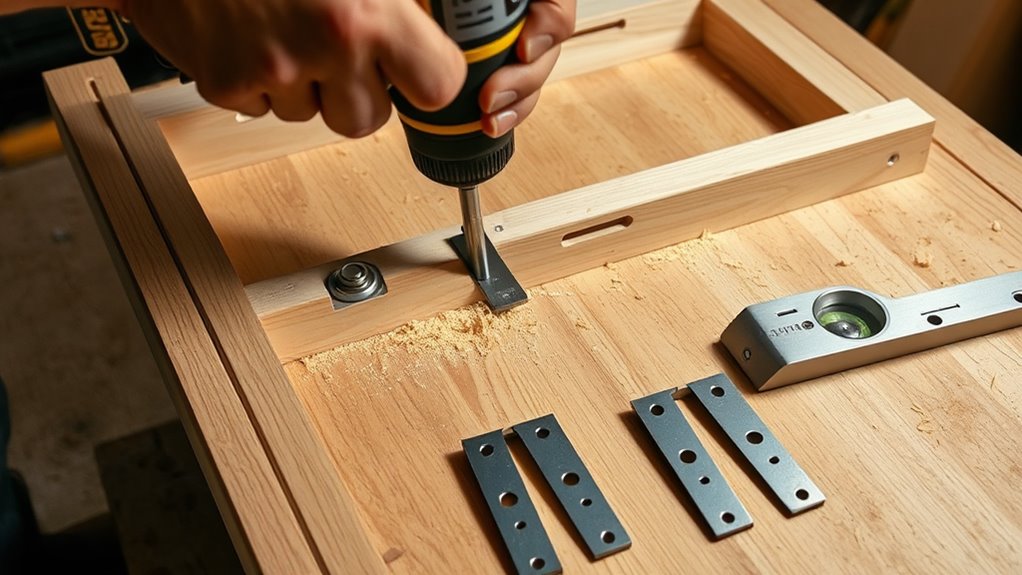
Once the base cabinets are properly leveled and secured, you’ll need to install support brackets to guarantee your countertops remain stable and level. Proper bracket installation and structural reinforcement are essential for preventing sagging and ensuring long-term durability.
Follow these vital steps for secure bracket placement:
- Mount L-brackets at 16-inch intervals along the cabinet tops, ensuring they’re flush with the upper edge and securely fastened into the frame
- Install extra support brackets at any seams, joints, or corners where two countertop sections meet
- Add corbels or heavy-duty brackets for any overhanging sections exceeding 6 inches
- Secure steel reinforcement strips along the length of any spans greater than 36 inches without cabinet support underneath
Double-check all bracket connections with a level before proceeding with countertop installation.
Applying Adhesive and Securing Countertops
Proper adhesive application and countertop placement require precise technique to guarantee a lasting, stable bond. When securing your countertops, you’ll need to match the adhesive type to your specific countertop material for best results.
| Adhesive Type | Compatible Materials |
|---|---|
| Silicone | Quartz, Granite |
| Construction | Laminate, Wood |
| Epoxy | Stone, Concrete |
| Polyurethane | Metal, Solid Surface |
| Liquid Nails | MDF, Particleboard |
Apply adhesive in a continuous S-pattern along the cabinet tops, ensuring 1/4-inch beads at 4-inch intervals. You’ll want to position the countertop within 10 minutes of adhesive application before it starts to cure. Press down firmly and use a level to check alignment. Once positioned, install mechanical fasteners through the mounting brackets, tightening them gradually in an alternating pattern to maintain even pressure.
Making Sink and Appliance Cutouts
Accurate sink and appliance cutouts serve as the foundation for a professional countertop installation. Before making any cuts, you’ll need to carefully transfer measurements using sink templates and appliance dimensions to mark your cutting lines with precision.
- Position your sink template or trace your actual sink on the countertop’s underside, ensuring it’s perfectly aligned with cabinet placement and plumbing locations
- Mark appliance cutouts using manufacturer’s specifications, adding the recommended clearance for proper ventilation and installation
- Drill starter holes at the corners of your marked areas using a 1/2-inch drill bit, which will serve as entry points for your jigsaw
- Cut along your marked lines using a jigsaw fitted with a fine-tooth blade, maintaining steady pressure and following the lines exactly
Test-fit all fixtures before final installation to verify precise measurements.
Sealing Joints and Edges
To protect your countertops from moisture damage and guarantee a flawless appearance, sealing all joints and exposed edges is a critical final step. Apply a continuous bead of color-matched silicone sealant along seams where countertop sections meet, ensuring complete coverage without gaps.
For proper joint sealing, initially clean surfaces thoroughly with denatured alcohol. Press sections together firmly and wipe excess sealant immediately with a clean cloth. When addressing edge finishing, apply sealant where countertops meet walls or backsplashes. Use painter’s tape on both surfaces for clean lines and professional results.
Allow sealant to cure for 24 hours before exposing to water or cleaning products. Check all sealed areas after curing to confirm complete coverage and adhesion. Address any gaps or separations immediately to prevent moisture infiltration.
Adding Finishing Touches and Hardware
Once your countertops are secured and sealed, installing the essential hardware components will complete your professional installation. The finishing touches require precise attention to detail and careful hardware installation to guarantee functionality and aesthetic appeal.
Execute these final steps in sequence:
- Install sink mounting clips at designated intervals, torquing to manufacturer specifications while avoiding over-tightening that could crack the countertop
- Mount faucet assemblies through pre-drilled holes using appropriate gaskets and securing nuts
- Attach support brackets for overhanging sections, spacing them every 24 inches and guaranteeing level placement
- Install backsplash mounting hardware and decorative end caps, applying silicone adhesive at connection points
Verify all hardware installations are secure and properly aligned before proceeding with plumbing connections and final cleanup of your newly installed countertop surface.
Frequently Asked Questions
How Long Should I Wait Before Using My Newly Installed Countertops?
You’ll need to observe specific curing times to guarantee ideal countertop durability. For epoxy adhesives, wait 24 hours before light use and 72 hours for full cure. If you’ve installed natural stone with silicone sealant, allow 24-48 hours. For concrete countertops, wait 48-72 hours minimum. Quartz and laminate installations typically require 24 hours. Don’t place heavy objects or apply excessive force during these vital curing periods.
Can I Install Countertops Myself if I Have No Prior Experience?
While it’s possible to install countertops yourself, it’s a complex project that requires specific tools needed, including a circular saw, level, caulking gun, and proper adhesives. Without prior experience, you’ll face challenges with precise measurements, seam alignment, and proper support. Installation tips include practicing cuts on scrap material initially and having a helper. For best results, it’s recommended to hire a professional who can guarantee proper installation and prevent costly mistakes.
What’s the Average Cost Difference Between Professional Installation Versus DIY Installation?
You’ll typically save 20-30% on cost factors through DIY installation, with professional services averaging $200-500 per linear foot versus $150-350 for materials-only DIY projects. Your installation savings can range from $500-2,000, depending on countertop material and kitchen size. However, you’ll need to factor in specialty tool purchases, which can cost $200-400, and potential material waste if errors occur during installation. Consider these variables when calculating total cost differential.
How Do I Maintain and Clean My Countertops After Installation?
You’ll need to adapt your cleaning solutions based on your specific countertop materials. For granite and marble, use pH-neutral cleaners and avoid acidic solutions that can etch the surface. For quartz, you can use mild soap and water or specialized stone cleaners. Laminate countertops tolerate most non-abrasive household cleaners. Apply a protective sealer annually to natural stone surfaces, and always use cutting boards to prevent scratches. Wipe spills immediately to prevent staining.
Should I Update My Plumbing Fixtures When Installing New Countertops?
When you’re planning countertop modifications, plumbing upgrades are highly recommended. You’ll want to guarantee fixture compatibility with your new countertop specifications, particularly regarding sink mounting styles and faucet hole configurations. It’s an opportune time to replace dated fixtures, as you’ve already disconnected the plumbing. Consider upgrading to modern, water-efficient faucets and installing new supply lines while you have clear access to the mounting areas.