To cut Formica countertops professionally, you’ll need a circular saw with a fine-toothed carbide blade, straightedge guide, measuring tape, and proper safety gear. Start by preparing your workspace and securing the countertop. Mark your cutting lines precisely, then apply masking tape on both sides to prevent chipping. Score the surface lightly before making your full-depth cut at medium-high speed. Follow the proper techniques and safety protocols to achieve flawless results like an expert.
Gather Your Essential Tools and Safety Equipment
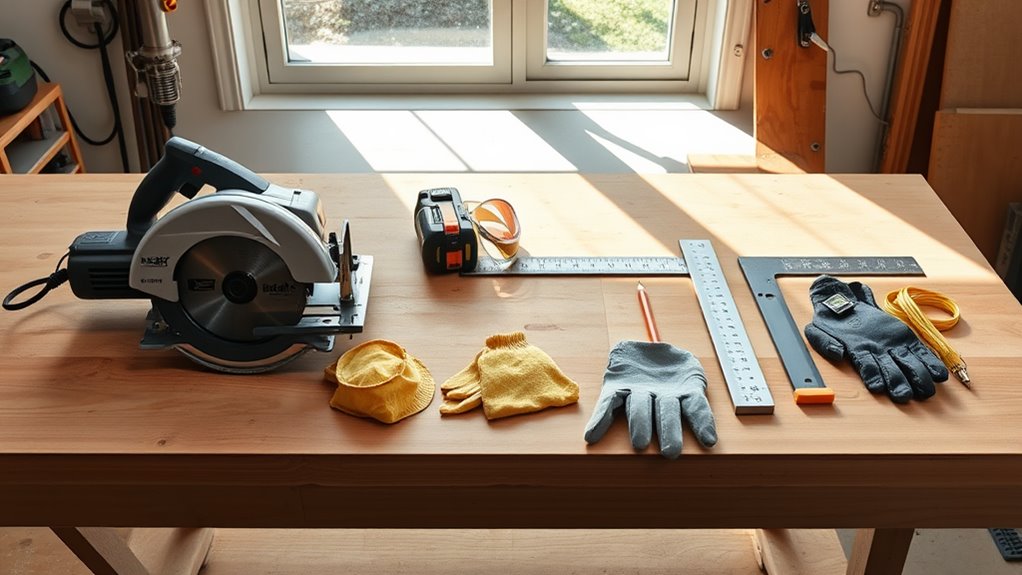
Six essential tools are required for safely cutting Formica countertops: a circular saw with a fine-toothed carbide blade, a straightedge guide, measuring tape, pencil, masking tape, and protective gear.
Before you begin, confirm your circular saw’s blade has 40 teeth or more to prevent chipping the laminate. You’ll need a metal straightedge that’s at least as long as your intended cut to serve as your cutting guide. Your safety equipment should include safety glasses, ear protection, and a dust mask to protect against airborne particles. Apply masking tape along your cutting line to prevent surface splintering.
Position your tools within easy reach of your work area, and verify that your saw’s power cord won’t interfere with the cutting path. Double-check that all safety equipment fits properly before starting.
Prepare Your Workspace for Cutting
Three key steps guarantee a properly prepared workspace for cutting Formica countertops. Initially, clear your work area of all unnecessary tools, materials, and debris, ensuring proper workspace organization for unobstructed movement and tool access. Second, secure your Formica piece to a sturdy workbench using C-clamps, positioning it so the cutting line extends beyond the bench edge.
Finally, implement essential safety precautions by covering nearby surfaces with drop cloths to protect them from dust and debris. You’ll also need to establish proper ventilation by opening windows or setting up fans, as cutting Formica produces fine particles. If you’re working indoors, consider connecting your power tools to a dust collection system. Position your safety equipment, including eye protection and dust mask, within easy reach.
Take Accurate Measurements and Mark Guidelines
With your workspace properly prepared, accurate measurements become your next priority. Place your Formica countertop on the work surface and double-check all dimensions against your installation plans. Using a measuring tape and carpenter’s square, mark your cutting lines with a sharp pencil, ensuring perfect 90-degree angles where needed.
For ideal cutting accuracy, apply masking tape along your pencil lines – this prevents chipping and creates a clearer guideline. Don’t forget to account for any sink cutouts or edge treatments in your measurement techniques. Mark an “X” on the waste side of your cutting line to avoid confusion during cutting. Once you’ve verified all measurements, use a straightedge to connect your marks with a solid, visible line that you’ll follow with your cutting tool.
Apply Masking Tape Along Cutting Lines
After double-checking your measurements, apply masking tape along both sides of your marked cutting lines to protect the Formica surface and create a precise cutting boundary. You’ll find that quality masking tape not just prevents chipping and splintering during the cutting process but also serves as a reliable straight-edge reference guide for your saw. Position the tape firmly against the surface, ensuring no gaps or bubbles that could compromise your cut’s accuracy.
Measure Twice, Tape Once
Once you’ve completed your measurements, apply masking tape along your marked cutting lines to prevent chipping and splintering during the cut. Use wide masking tape for ideal coverage and guarantee it’s pressed firmly against the surface without air bubbles or gaps.
| Measuring Technique | Application Method | Results |
|---|---|---|
| Digital Measure | Single Strip | Good |
| Manual Measure | Double Strip | Better |
| Laser Guide | Triple Strip | Best |
| Template Use | Reinforced Edge | Excellent |
| Combination | Full Coverage | Superior |
When applying tape, start from one end and work your way across, maintaining consistent pressure. Don’t rush the tape application process – proper adhesion is vital for clean cuts. For complex cuts or corners, use multiple strips of tape to guarantee complete coverage. Your measuring techniques should account for blade width and any required adjustments for precise fitment.
Prevent Chipping and Splintering
Three essential steps prevent chipping and splintering when cutting Formica countertops. Initially, apply a strip of masking tape along both sides of your cutting line, pressing firmly to guarantee complete adhesion. The tape serves as a vital chipping prevention barrier, protecting the delicate laminate surface during the cut.
Next, score the tape and Formica surface lightly with a utility knife before making your primary cut. This scoring technique creates a clean guide that helps prevent surface damage. Ultimately, set your circular saw blade to extend just 1/8 inch below the countertop’s bottom surface. This splintering technique assures minimal tear-out on the underside.
You’ll need to maintain steady pressure and a consistent cutting speed throughout the process. Don’t rush – smooth, controlled movements produce the cleanest edges.
Straight Edge Reference Guide
A reliable straight edge reference guide serves as your critical initial step for precise Formica cuts. Apply masking tape along your intended cutting line, ensuring it’s perfectly straight and aligned with your measurements. This tape will serve not just to guide your cutting techniques but also to protect the surface from scratches and splintering.
Position a metal straight edge or ruler firmly against the tape line, leaving about 1/8 inch between the guide and your actual cut line. You’ll want this small gap to accommodate your saw blade’s width. Secure the straight edge with C-clamps at both ends to prevent any movement during cutting. This setup is essential for edge finishing, as it creates a clean, professional cut that requires minimal post-cut smoothing. Double-check all measurements before proceeding with your cut.
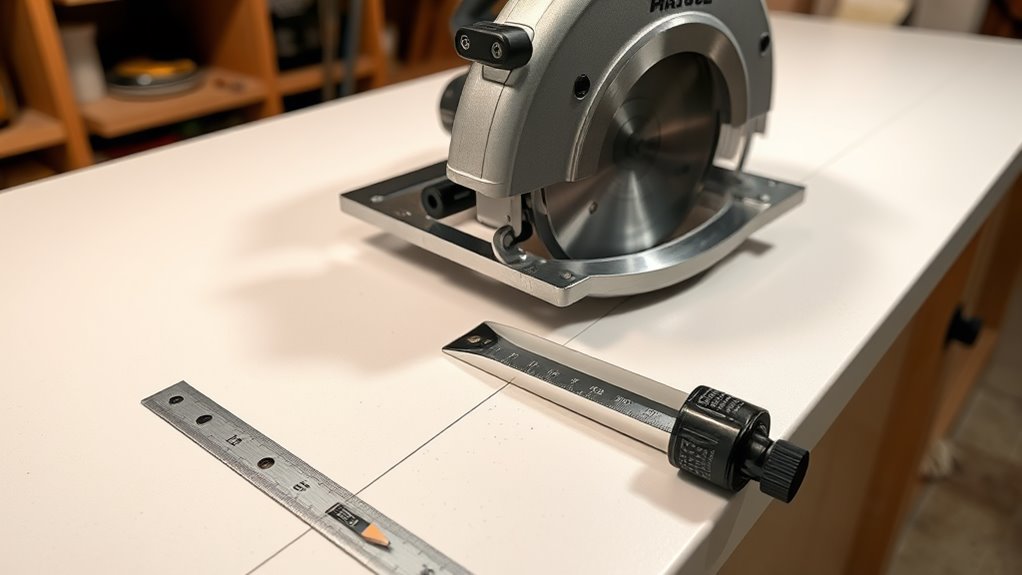
Position Your Saw Guide or Straightedge
Positioning your saw guide or straightedge precisely is critical for achieving clean, accurate cuts in Formica countertops. Place your guide approximately 1½ inches from your marked cutting line, accounting for the distance between your saw blade’s edge and the saw’s base plate. This offset guarantees your saw blade types, whether circular or jigsaw, will follow the exact cutting line you’ve marked.
Secure the straightedge firmly using C-clamps or heavy-duty tape, confirming it won’t shift during cutting techniques. Double-check that your guide is perfectly parallel to your marked line by measuring the distance at both ends. If you’re using a circular saw, position the guide on the waste side of the cut to prevent binding. For best results, test your setup on a scrap piece before making the final cut on your countertop.
Set Up Your Electric Saw Properly
Properly configuring your electric saw guarantees both safety and cutting precision when working with Formica countertops. You’ll need to select appropriate saw blade types based on your specific cutting requirements and make certain all safety mechanisms are functioning correctly.
- Check that your saw’s blade is sharp and designed for laminate materials – fine-toothed blades work best
- Set the blade depth to extend just 1/8 inch below the countertop’s thickness
- Verify the blade guard is moving freely and returning to its protective position
- Make certain all power cords are safely positioned away from the cutting area
- Double-check that your electric saw’s base plate is clean and moves smoothly
Before starting your cut, test the saw’s operation on a scrap piece of Formica to confirm proper setup and blade performance. Electric saw safety is paramount – wear appropriate protective gear including safety glasses and hearing protection.
Make the Initial Score Cut
Before making the full-depth cut, you’ll need to score the Formica surface to prevent chipping and assure a clean edge. Set your circular saw’s blade depth to 1/8 inch and make sure you’re using a fine-toothed blade designed for laminate cutting.
| Score Cutting Techniques | Blade Selection Tips | Expected Results |
|---|---|---|
| Light pressure only | 40-tooth minimum | Clean surface edge |
| Steady, even motion | Carbide-tipped blade | No chip-out |
| Follow guide line | Zero clearance insert | Precise scoring |
Position yourself with a clear view of your marked cutting line. Starting from the far end, guide the saw slowly along your measurement marks while maintaining consistent pressure. Don’t force the blade – let it do the work. This initial scoring pass creates a shallow channel that’ll prevent the laminate from splintering when you make your final through-cut.
Complete the Full-Depth Cut
Adjust your circular saw blade to its full cutting depth after completing the score cut. Now you’ll execute the final cutting techniques to complete the countertop separation. Position your saw along the scored line and verify the blade guard is functioning properly.
Essential steps for the full-depth cut:
Following proper cutting steps ensures precision and safety when making full-depth cuts in your countertop project.
- Set your saw’s speed to medium-high for ideal control and clean cutting
- Follow the score line precisely, letting the saw’s weight do the work
- Keep steady pressure and maintain a consistent cutting pace
- Support the cut piece to prevent binding or splintering
- Wear safety goggles and a dust mask during the operation
Your tool selection is vital for this step – use a carbide-tipped blade with at least 60 teeth for the smoothest cut. Once you’ve completed the full-depth pass, you’ll have a clean, professional edge ready for finishing.
Sand and Smooth the Edges
Smoothing the cut edges requires progressive sanding to achieve a professional finish. Start with 80-grit sandpaper to remove any roughness or chipping from the cutting process. Work along the edge in a single direction, applying moderate pressure to guarantee uniform results.
Next, switch to 120-grit sandpaper for your edge finishing technique. This step helps eliminate the coarse scratches left by the previous grit. Ultimately, use 220-grit sandpaper to create a smooth, refined surface. You’ll want to maintain consistent pressure and movement throughout all sanding techniques.
Once you’ve completed the progressive sanding, wipe the edges clean with a tack cloth to remove any dust. If you notice any remaining imperfections, repeat the process with the appropriate grit until you achieve the desired smoothness.
Clean Up and Test the Fit
After completing the sanding process, thoroughly remove all dust and debris from your work area and the countertop surface. For effective cleanup tips and fit testing, follow these critical steps to guarantee your Formica countertop installation succeeds.
- Wipe down all surfaces with a tack cloth to remove fine dust particles
- Test fit the countertop in its intended location, checking for level placement
- Verify all edges align properly with adjacent walls and cabinets
- Measure gaps between seams and edges, confirming they’re within 1/16 inch tolerance
- Mark any areas requiring supplementary adjustments with a pencil
Once you’ve confirmed proper fit, remove the countertop and clean the installation area thoroughly. Pay special attention to cabinet tops and corners where dust might accumulate. Your Formica countertop is now ready for final installation.
Frequently Asked Questions
How Long Should I Wait Before Installing the Cut Formica Countertop?
You’ll want to wait at least 24 hours after cutting your Formica countertop before proceeding with installation. This waiting period guarantees proper countertop stability and allows any adhesives or sealants to fully cure. If you’ve used contact cement, it’s essential to wait until it’s completely dry. Don’t rush the installation timing, as premature installation can lead to warping or improper bonding. For best results, maintain room temperature conditions during this waiting period.
Can Formica Countertops Be Cut With a Manual Handsaw Instead?
While you can technically use a manual handsaw to cut Formica countertops, it’s not recommended as it won’t deliver the cutting precision you need. Manual handsaw techniques often result in rough, chipped edges and uneven cuts that can ruin your countertop. You’ll risk splintering the laminate and damaging the substrate. Instead, it’s best to use a circular saw with a fine-toothed blade or a router for professional-quality results.
What’s the Average Cost to Replace Versus Cutting Formica Countertops Yourself?
You’ll find significant cost differences between DIY and professional Formica countertop installations. DIY costs typically range from $200-$400 for materials and basic tools, while professional costs average $800-$1,200 for a standard kitchen installation. If you’re comfortable with precise measurements and careful cutting, you can save 50-70% by doing it yourself. However, mistakes during DIY installation can be costly and might require professional intervention to fix.
How Do I Repair Chips or Cracks That Occur While Cutting?
You can effectively repair chips and cracks in Formica using specialized laminate repair products. For small chips, apply color-matched repair paste and level it with a plastic scraper. For larger cracks, clean the area thoroughly, fill with two-part epoxy, and let it cure completely. You’ll want to sand the repaired area smooth with fine-grit sandpaper, then buff to match the surrounding finish. Don’t forget to seal the repair to prevent moisture damage.
Is It Possible to Cut Formica Countertops That Are Already Installed?
Yes, you can cut installed Formica countertops, but it’s more challenging than pre-installation cutting. You’ll need to use specific cutting techniques like scoring with a utility knife and using a circular saw with a fine-toothed blade. Installation challenges include limited workspace, potential damage to surrounding cabinets, and controlling dust. It’s vital to protect adjacent surfaces and use a straight edge guide to guarantee precise cuts.