Clean your countertop ice maker by initially unplugging it and removing all ice and detachable parts. Mix equal parts white vinegar and warm water for a natural cleaning solution. Wipe external surfaces with a damp microfiber cloth, then sanitize the water reservoir and components with the solution. Rinse everything thoroughly at least three times and run two ice-making cycles with fresh water, discarding the ice. Follow our detailed steps to guarantee your ice maker maintains peak performance.
Gather Your Cleaning Supplies
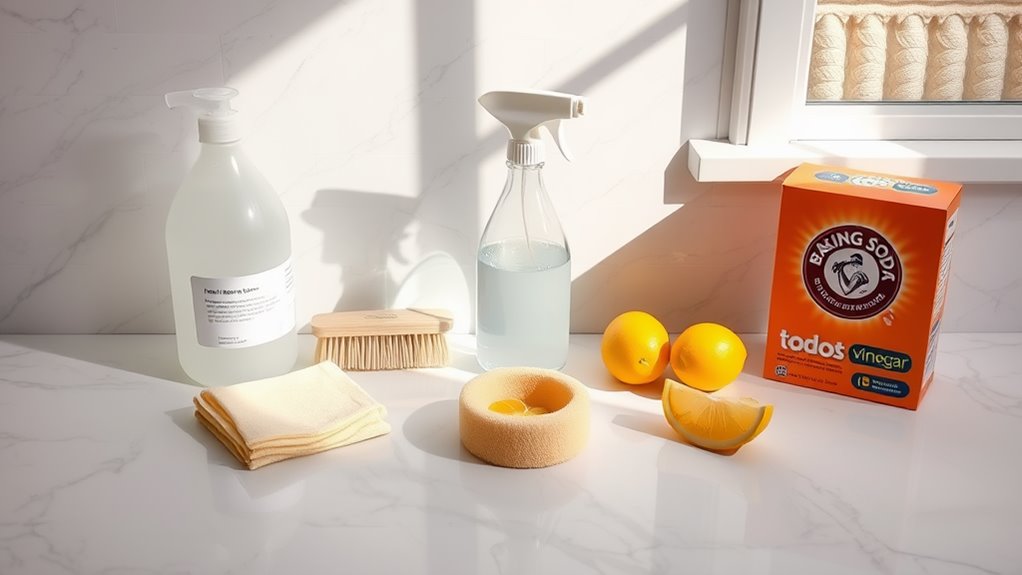
Three essential supplies are needed to properly clean your countertop ice maker: white vinegar, warm water, and a soft microfiber cloth. White vinegar serves as a natural disinfectant and descaler, effectively removing mineral deposits and bacteria. You’ll need approximately two cups of vinegar mixed with two cups of warm water to create your cleaning solution.
Additional cleaning supplies that will improve your maintenance process include a small brush for reaching tight corners, a spray bottle for solution application, and clean towels for drying. These essential tools guarantee thorough sanitization of your ice maker’s components. If your unit has stubborn buildup, you might also want to keep a toothbrush handy for detailed scrubbing. Remember to avoid harsh chemical cleaners, as they can damage the machine’s interior and potentially contaminate future ice production.
Unplug and Empty the Ice Maker
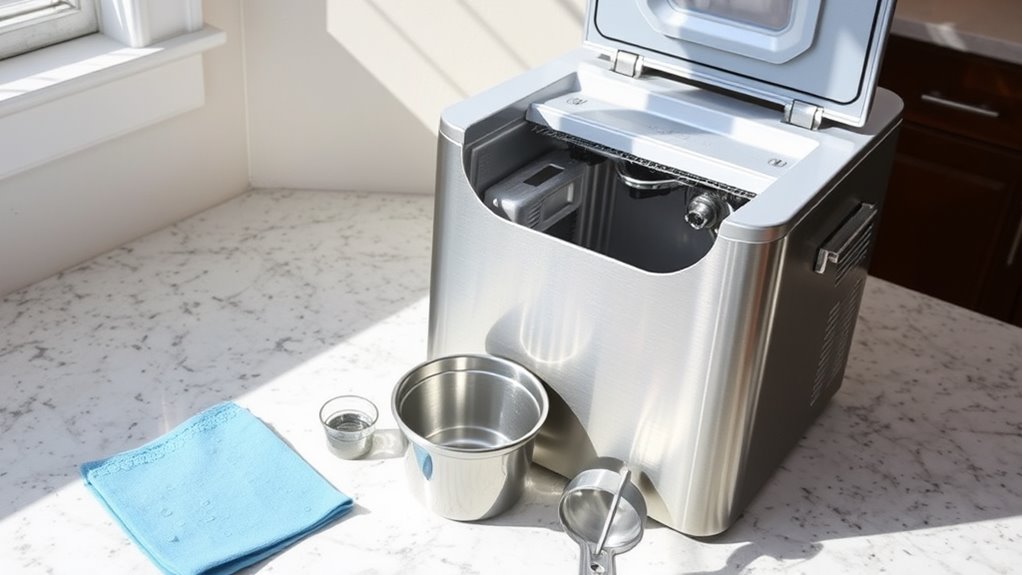
With your cleaning supplies ready, the initial step in maintenance is confirming your safety and proper preparation of the ice maker. Unplug the unit from the electrical outlet to prevent any risk of shock during the cleaning process. Remove the power cord completely from the wall and position it where it won’t get wet.
As part of regular ice maker maintenance, you’ll need to dispose of any remaining ice from the storage bin and remove the ice basket. If there’s ice stuck in the production mechanism, let it melt naturally – don’t use force to remove it. Pour out any standing water from the water reservoir into your sink. The cleaning frequency of your unit depends on usage, but you should perform this process at least every 3-6 months to prevent mineral buildup and guarantee peak performance.
Remove Detachable Parts
Disassembly marks the next vital phase in cleaning your countertop ice maker. Begin by locating all detachable parts, including the ice basket, scoop, water reservoir, and filter components. Consult your owner’s manual to identify every removable element specific to your model.
One of the important maintenance tips is to create a designated space on your counter where you’ll place these parts in the order you’ve removed them. This systematic approach guarantees you won’t misplace components and helps you remember their correct positioning during reassembly. If your model features a drain plug, remove it now to allow any remaining water to exit completely. Take special care with smaller components like gaskets or seals, as these are essential for proper operation but can be easily misplaced during the cleaning process.
Create the Cleaning Solution
You’ll need either a vinegar-water solution (1:1 ratio) or a specialized ice maker cleaning solution mixed according to the manufacturer’s instructions. Test the solution’s temperature to guarantee it’s at room temperature, as extreme temperatures can damage internal components. Once you’ve selected your cleaning solution, combine the ingredients in a clean container that’s large enough to accommodate the ice maker’s water reservoir capacity.
Safe Cleaning Solution Options
Several safe and effective cleaning solutions can be used to sanitize your countertop ice maker. You’ll find both commercial cleaners specifically designed for ice makers and natural disinfectant alternatives that work effectively. Mix one part white vinegar with three parts water for an eco-friendly option that removes mineral deposits and kills bacteria. Alternatively, combine two tablespoons of lemon juice with two cups of water for another natural solution.
For commercial options, choose cleaners labeled specifically for ice makers or food-grade sanitizers. These products typically contain citric acid or other FDA-approved ingredients. If you’re seeking eco-friendly options, look for biodegradable cleaners or those certified by environmental organizations. Never use harsh chemicals, bleach, or ammonia-based products, as these can contaminate future ice production and damage your machine’s components.
Proper Solution Measurements
Accurate measurements are essential when creating a cleaning solution for your countertop ice maker. Follow the solution dilution ratios carefully to guarantee ideal cleaning without damaging your machine’s components.
For a vinegar-based solution, mix one part white vinegar with three parts water. If you’re using citric acid, dissolve 2 tablespoons per quart of warm water. When using commercial cleaners, strictly adhere to the manufacturer’s recommended ratios on the label.
Measurement accuracy matters – use proper measuring tools like graduated cups or spoons rather than estimating. Don’t exceed the recommended concentrations, as stronger solutions won’t clean better and may corrode internal parts. For smaller ice makers, you’ll typically need 2-3 cups of solution total, while larger units may require up to 4 cups.
Mix and Test Temperature
Creating the perfect cleaning solution requires careful attention to both mixing technique and temperature control. Using a designated mixing container, combine the measured cleaning agent with water while gently stirring to guarantee even distribution. The best mixing temperatures should range between 95-105°F (35-40°C) for most cleaning solutions.
Before applying the mixture to your ice maker, you’ll need to test it using a kitchen thermometer. If the solution’s too hot, it could damage the unit’s plastic components; if too cold, it won’t clean effectively. After testing mixtures for proper temperature, let the solution stand for 2-3 minutes to stabilize. If needed, adjust the temperature by adding small amounts of hot or cold water until you achieve the perfect range. Remember to maintain this temperature throughout the cleaning process.
Wipe Down External Surfaces
Start by cleaning the external surfaces of your countertop ice maker with a soft, damp microfiber cloth to remove dust, fingerprints, and water spots. Don’t use harsh cleaning products or abrasive materials that could scratch or damage the unit’s finish. For stubborn stains, apply a mild dish soap solution, then wipe clean with a cloth dampened in plain water.
Pay special attention to the control panel, display screen, and ventilation areas where debris often accumulates. One of the essential maintenance tips is to avoid spraying cleaners directly onto the machine. Instead, apply cleaning solutions to your cloth initially. Once you’ve finished wiping down all external surfaces, use a dry microfiber cloth to buff the exterior, ensuring no water droplets remain that could cause water spots or mineral deposits.
Clean the Interior Components
After ensuring the exterior is spotless, the interior components require thorough attention to maintain ideal ice production. Start by removing the ice basket and water reservoir, then unplug the unit for safety during interior maintenance. Using a soft brush, gently clean the evaporator rods, ice tray, and water distribution tubes to remove mineral deposits and scale buildup.
For proper component care, mix a solution of equal parts water and white vinegar. Apply this mixture to all internal surfaces using a clean cloth, paying special attention to areas where water flows. Let the solution sit for 5 minutes, then wipe thoroughly with fresh water. Dry all components with a lint-free cloth before reassembling. Don’t forget to clean the water filter if your model includes one, as this affects ice quality.
Sanitize the Water Reservoir
The water reservoir requires regular sanitization to prevent bacterial growth and guarantee clean ice production. Create a solution using 1 tablespoon of bleach per gallon of water, then fill the reservoir with this mixture. Let it sit for 10 minutes to effectively disinfect all surfaces.
Drain the sanitizing solution completely and rinse the reservoir thoroughly with clean water at least three times. This guarantees no bleach residue remains, which could affect water quality and ice taste. Run two complete ice-making cycles with fresh water, discarding all ice produced during these cycles.
For ideal ice production, repeat this sanitization process monthly or more frequently if you notice scale buildup, odd tastes, or decreased ice clarity. Check your manufacturer’s manual for specific recommendations regarding approved sanitizing solutions for your model.
Rinse Thoroughly
You’ll need to carefully flush all internal components with filtered water to eliminate any remaining cleaning solution. Using filtered water prevents mineral deposits from forming during the rinsing process and guarantees ideal cleanliness. Run multiple rinse cycles until the water flows completely clear and you can’t detect any trace of cleaning agents.
Clear All Internal Parts
Now it’s time to thoroughly rinse every removable component from your countertop ice maker. One of the most critical ice maker maintenance steps involves ensuring no cleaning solution remains on any surfaces. Use clean, room-temperature water to rinse each part individually, paying special attention to corners and crevices.
Turn each component under running water, checking that water runs clear and no soap residue remains. These cleaning techniques require patience – don’t rush this step. Focus on the ice basket, water reservoir, water lines, and scoop. If you detect any lingering cleaning solution smell, continue rinsing. For best results, use filtered water for the final rinse to prevent mineral deposits. Once you’re confident all parts are thoroughly rinsed, shake off excess water and prepare for reassembly.
Use Filtered Water Only
For ideal ice maker performance and longevity, filtered water should be your standard choice when operating the appliance. Water quality importance can’t be overstated, as unfiltered water often contains minerals, sediments, and impurities that can accumulate in your machine over time.
The filtered water benefits extend beyond just cleaner ice. You’ll notice improved taste and clarity in your ice cubes, while also preventing scale buildup on internal components. Connect your ice maker to a water filtration system or use store-bought filtered water to maintain peak performance. If you’re using tap water, install an in-line water filter specifically designed for ice makers. Remember to change your water filters according to manufacturer recommendations, typically every six months, to guarantee consistent water quality and protect your investment.
Remove Residual Cleaning Solution
Three thorough rinse cycles are vital after cleaning your countertop ice maker to remove all traces of cleaning solution. Residual buildup of cleaning agents can affect ice taste and potentially pose health risks, making proper rinsing techniques essential.
- Fill the water reservoir with clean, filtered water and run a complete ice-making cycle
- Discard all ice produced during the initial cycle, then wipe down interior surfaces with a clean, damp cloth
- Repeat the process for a second cycle, paying special attention to corners and crevices where cleaning solution might collect
- Complete a third and final rinse cycle, testing the last batch of ice for any unusual taste or odor
These systematic cleaning techniques guarantee your ice maker is thoroughly cleared of cleaning solutions and ready for regular use.
Reassemble and Test
After thoroughly cleaning and drying all components, carefully reassemble your countertop ice maker in the reverse order of disassembly. Confirm all parts snap securely into place and check that seals and gaskets are properly aligned to prevent water leaks.
Before regular operation, run two complete ice-making cycles using fresh water to test ice maker functionality and flush out any remaining cleaning solution. Discard these initial batches of ice. Watch for proper water flow and ice formation during the test cycles. If you notice unusual sounds, leaks, or irregular ice production, consult your owner’s manual for troubleshooting tips. Check that the water reservoir is filled to the correct level and verify that all components are correctly positioned. Once you’re satisfied with the test results, your ice maker is ready for normal use.
Maintain Regular Cleaning Schedule
Regular maintenance of your countertop ice maker will prevent mineral buildup and guarantee consistent, high-quality ice production. To enhance your machine’s performance and longevity, establish a cleaning frequency based on your usage patterns and water hardness level. Most manufacturers recommend deep cleaning every 3-6 months, but you’ll need more frequent maintenance if you use hard water.
Follow these essential maintenance tips:
- Wipe down exterior surfaces daily with a soft, damp cloth
- Clean the ice basket and scoop weekly with mild soap and warm water
- Run a sanitizing cycle monthly using a manufacturer-approved cleaning solution
- Descale the unit quarterly to remove mineral deposits and lime scale
Document your cleaning schedule and set calendar reminders to promote consistent maintenance. This systematic approach will extend your ice maker’s lifespan and maintain peak performance.
Frequently Asked Questions
Can I Use Bleach to Clean My Countertop Ice Maker?
Don’t use bleach to clean your ice maker as it’s too harsh and can damage components or leave harmful residues that could contaminate your ice. Instead, opt for safe cleaning alternatives like vinegar, food-grade citric acid, or specialized ice maker cleaners. You’ll want to use a solution that’s both effective at removing mineral deposits and safe for food-contact surfaces. These bleach alternatives will maintain your machine’s performance while ensuring safe ice production.
Why Does My Ice Maker Produce Cloudy or White Ice?
Your ice maker’s cloudy ice typically results from trapped air bubbles and mineral content in the water supply. You’ll notice diminished ice quality when using unfiltered tap water with high mineral concentrations. To solve this, you can install a water filter, use distilled water, or slow down your machine’s freezing cycle. Faster freezing traps more air bubbles, while slower freezing allows impurities and air to escape, producing clearer ice cubes.
How Often Should I Replace the Water Filter?
You’ll need to evaluate your water filter’s lifespan based on usage and manufacturer recommendations. Generally, you should replace your ice maker’s water filter every 6 months or after filtering approximately 3,000 gallons of water, whichever comes initially. However, if you notice decreased ice quality or slower production before the 6-month mark, don’t wait—replace it sooner. Check your specific model’s manual for precise filter replacement frequency guidelines.
What Causes Ice to Taste Funny or Have an Odor?
Several ice contamination sources can cause your ice to taste or smell unpleasant. You’ll often find these issues stem from mineral buildup in your water supply, bacteria growth in the system, or absorbed freezer odors. For effective odor removal techniques, you should clean your water lines regularly, replace old water filters, and store ice in sealed containers. If you’re using tap water, consider installing a water filtration system to eliminate metallic tastes and unwanted minerals.
Can Hard Water Damage My Countertop Ice Maker?
Yes, hard water can considerably damage your ice maker. The high mineral content, particularly calcium and magnesium, creates scale buildup inside your machine’s components. This scaling can clog water lines, reduce efficiency, and strain the motor and pump. If you don’t address hard water issues, you’ll face decreased ice production, mechanical failures, and potentially costly repairs. Consider installing a water filter or softener to protect your ice maker’s longevity.