To cut granite countertops like a pro, you’ll need three essential power tools: a circular saw with diamond blade, angle grinder, and wet polisher. Start by measuring precisely and marking with a water-soluble marker. Set up your workspace with proper lighting and a stable surface at waist height. Execute cuts in progressive passes while maintaining steady pressure and water flow. Ultimately, finish edges using diamond pads from 50 to 3000 grit. Master these fundamentals to achieve professional-grade results.
Essential Tools and Safety Equipment
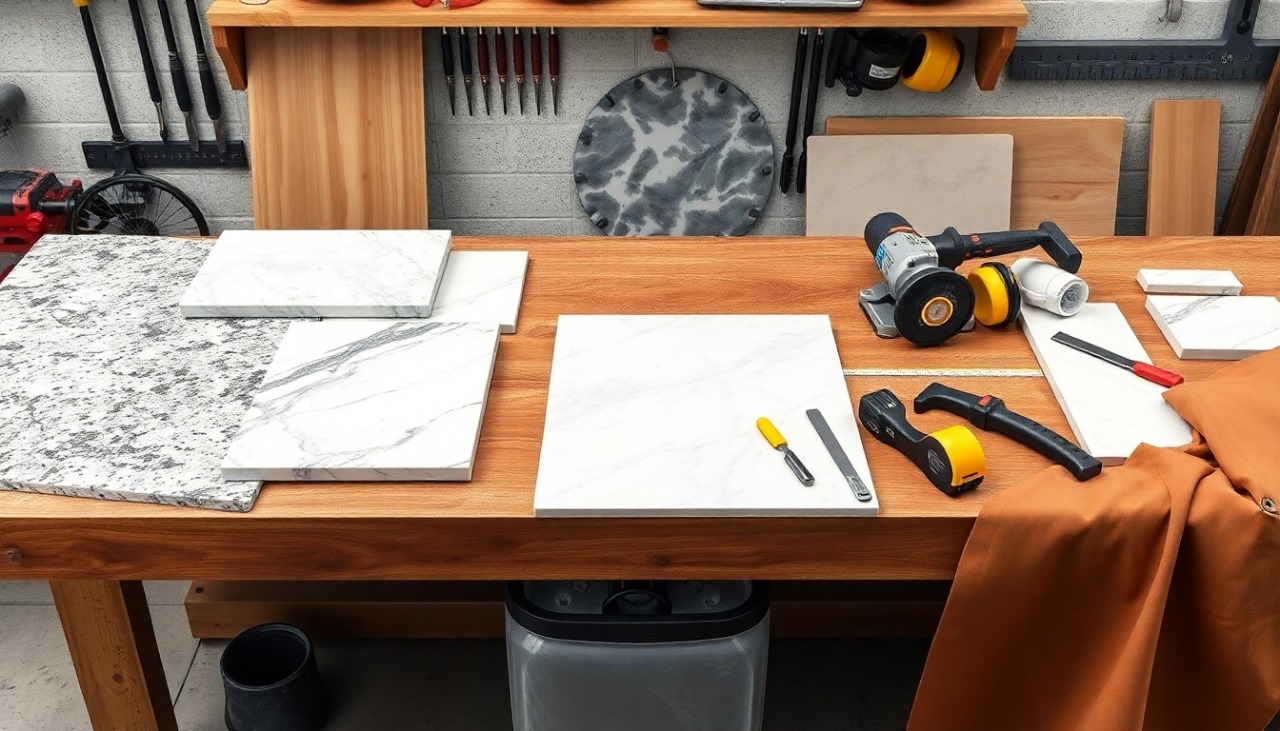
Three essential power tools form the foundation for cutting granite countertops: a circular saw with diamond blade, an angle grinder, and a wet polisher. You’ll also need measuring tools, including a tape measure, marking pencils, and a straightedge for precise cutting techniques across different granite types.
Safety equipment is non-negotiable when working with granite. You must wear impact-resistant safety goggles, a respirator mask rated for silica dust, ear protection, and heavy-duty work gloves. Since cutting granite creates significant dust, you’ll need a water source for wet-cutting and proper ventilation in your work area. Supplementary items include clamps to secure the granite, sawhorses or a sturdy work table, and a shop vacuum equipped with a HEPA filter for dust collection.
Measuring and Marking Your Granite
The critical initial step in cutting granite requires precise measurements and clear markings to guarantee accurate cuts. Using your measuring tape, account for the granite thickness and add necessary overhangs when calculating dimensions. Double-check all measurements before proceeding with your marking techniques.
Precise measurements are the foundation of successful granite cutting. Take time to double-check dimensions before making any marks.
Transfer your measurements to the granite surface using a water-soluble marker or soapstone pencil, ensuring your lines are clearly visible. You’ll need straight edges and squares to maintain perfect alignment throughout the marking process.
- Place your measuring tape flat against the surface and mark both ends of the intended cut line
- Create a continuous line using your straight edge as a guide, pressing firmly with your marking tool
- Verify all angles are square and double-check measurements against your original calculations before cutting
Setting Up Your Workspace

Since proper workspace setup directly impacts both safety and cutting precision, arranging your cutting area requires careful consideration. You’ll need a flat, stable surface at waist height and ideal lighting from multiple angles to eliminate shadows. Guarantee proper workspace organization with all tools within arm’s reach.
| Essential Setup | Safety Items | Environmental |
|---|---|---|
| Level table | Safety glasses | Ventilation |
| Tool layout | Dust mask | Water source |
| Power access | Work gloves | Drainage area |
Position your cutting station away from foot traffic and guarantee adequate space for material handling. You’ll want at least 6 feet of clearance on all sides. Set up dust collection systems and water lines before beginning. Remember to check that your power source can handle the amperage requirements of your cutting tools.
Executing the Perfect Cut
Making precise cuts in granite requires methodical preparation and unwavering focus throughout the cutting process. Before initiating your cut, verify you’ve selected the proper diamond blade for your granite’s thickness and composition. Position your cutting guide firmly and double-check all measurements.
When executing the cut, maintain steady pressure and a consistent speed. Your cutting techniques should focus on letting the blade do the work – don’t force it through the material. You’ll want to make your cut in progressive passes, increasing depth by 1/2 inch with each pass.
- Keep the blade cool with a constant water supply to prevent cracking and extend blade life
- Move the saw in one continuous motion to avoid jagged edges
- Watch for blade wobble, which indicates misalignment or wear
Complete your cut by easing off pressure as you reach the end to prevent chipping.
Finishing and Edge Treatment

Once you’ve completed your primary cuts, proper finishing and edge treatment will transform raw granite edges into professionally polished surfaces. Apply progressive polishing techniques using diamond pads in ascending grits, starting at 50 and working up to 3000 for a glass-like finish.
| Edge Profile | Application Method |
|---|---|
| Bullnose | Two-step rounded polish |
| Bevel | 45-degree angle cut |
| Ogee | Specialized router bit |
| Dupont | Multi-pass shaping |
| Waterfall | Continuous vertical drop |
After selecting your desired edge profile, you’ll need to maintain consistent pressure and speed while working the edge. Keep the polisher wet throughout the process to prevent dust and guarantee ideal results. For intricate profiles like ogee or dupont, you’ll need specialized router bits and multiple passes to achieve the desired shape.
Frequently Asked Questions
How Long Does It Take for Newly Cut Granite to Fully Cure?
You’ll need to allow 24-48 hours for newly cut granite to fully complete its curing process. During this time, avoid placing heavy objects or applying pressure on the surface. While the granite itself is already solid, the sealants and adhesives used require this time to achieve maximum strength. As part of proper granite maintenance, you should minimize contact with the surface and keep it dry during this essential curing period.
What’s the Average Lifespan of a Granite Countertop After Cutting and Installation?
With proper granite maintenance, your countertop can last 30 to 100 years. This exceptional countertop durability stems from granite’s natural hardness and resistance to wear. You’ll need to reseal the surface every 1-2 years and avoid harsh chemicals to maintain its longevity. If you’re diligent about upkeep and prevent physical damage like impacts or extreme heat exposure, your granite countertop will likely outlast most other kitchen fixtures you’ll install.
Can I Cut Granite Outdoors in Cold Weather Conditions?
You can cut granite outdoors in cold weather, but you’ll need to take extra precautions. Cold temperatures can make the stone more brittle and affect your cutting techniques. Keep your work area above 40°F (4°C) and guarantee proper outdoor safety measures, including dust control and adequate ventilation. It’s crucial to maintain a consistent water flow during cutting to prevent thermal shock and potential cracking. Consider using a temporary shelter for better temperature control.
How Much Does Professional Granite Cutting Typically Cost Compared to DIY?
Professional granite cutting costs typically range from $40-100 per linear foot, while DIY granite expenses can be considerably lower at $10-25 per linear foot for materials. You’ll need to factor in tool costs if you’re doing it yourself, including a wet saw ($200-500), diamond blades ($50-100), and safety equipment ($100). However, mistakes in DIY cutting can be costly, potentially ruining an entire slab worth thousands of dollars.
What Should I Do if I Accidentally Chip the Granite While Cutting?
If you accidentally chip your granite, don’t panic. You can address minor chips using a professional-grade granite chip repair kit, which typically includes color-matched epoxy and hardener. For ideal results, clean the chipped area thoroughly, mix the epoxy according to instructions, and carefully fill the void. Once cured, sand the repair flush with the surrounding surface. For larger chips or complex damage, it’s best to contact a granite restoration specialist to guarantee seamless repairs.